Docker for Bootcamps 2 -- Backend
Multiple Docker instances
If it’s not so hard to run one Docker instance, let’s try a second one. The architecture we will achieve is very similar to the previous post, but with two instances instead of one. Then we will use a docker-compose.yml file to automate the process.
We will use a frontend app made with Create React App that talks with a backend app (with no database) over a REST API. You can use this sample app here, or make use your own if it follows this architecture.
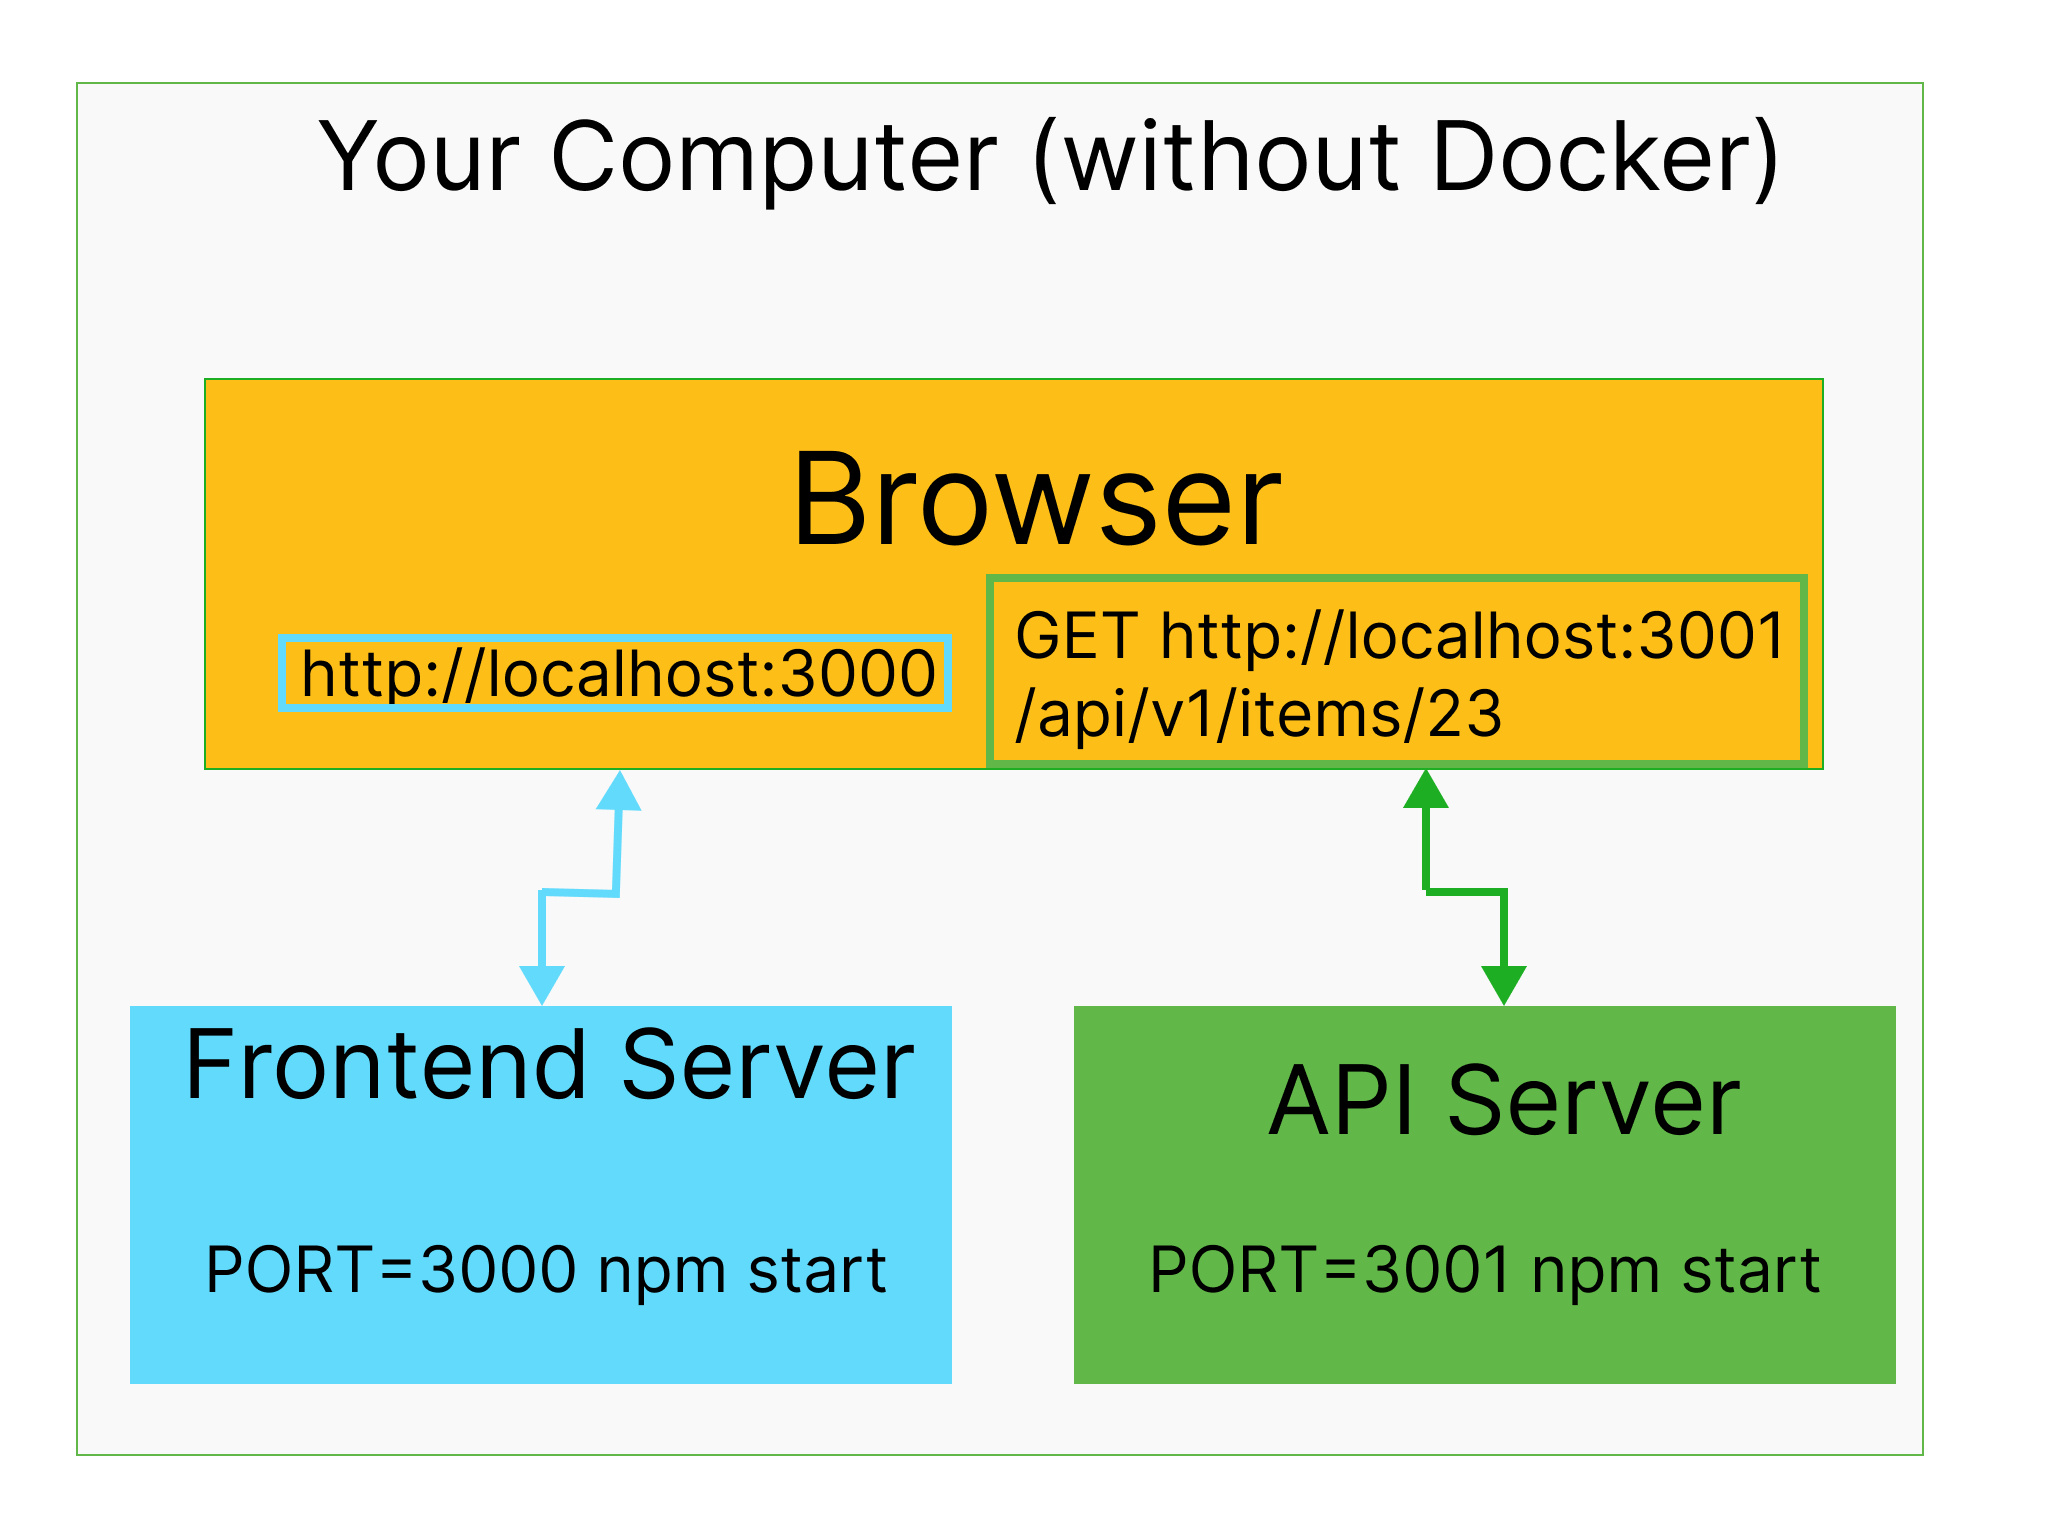
Our dev architecture before Docker.
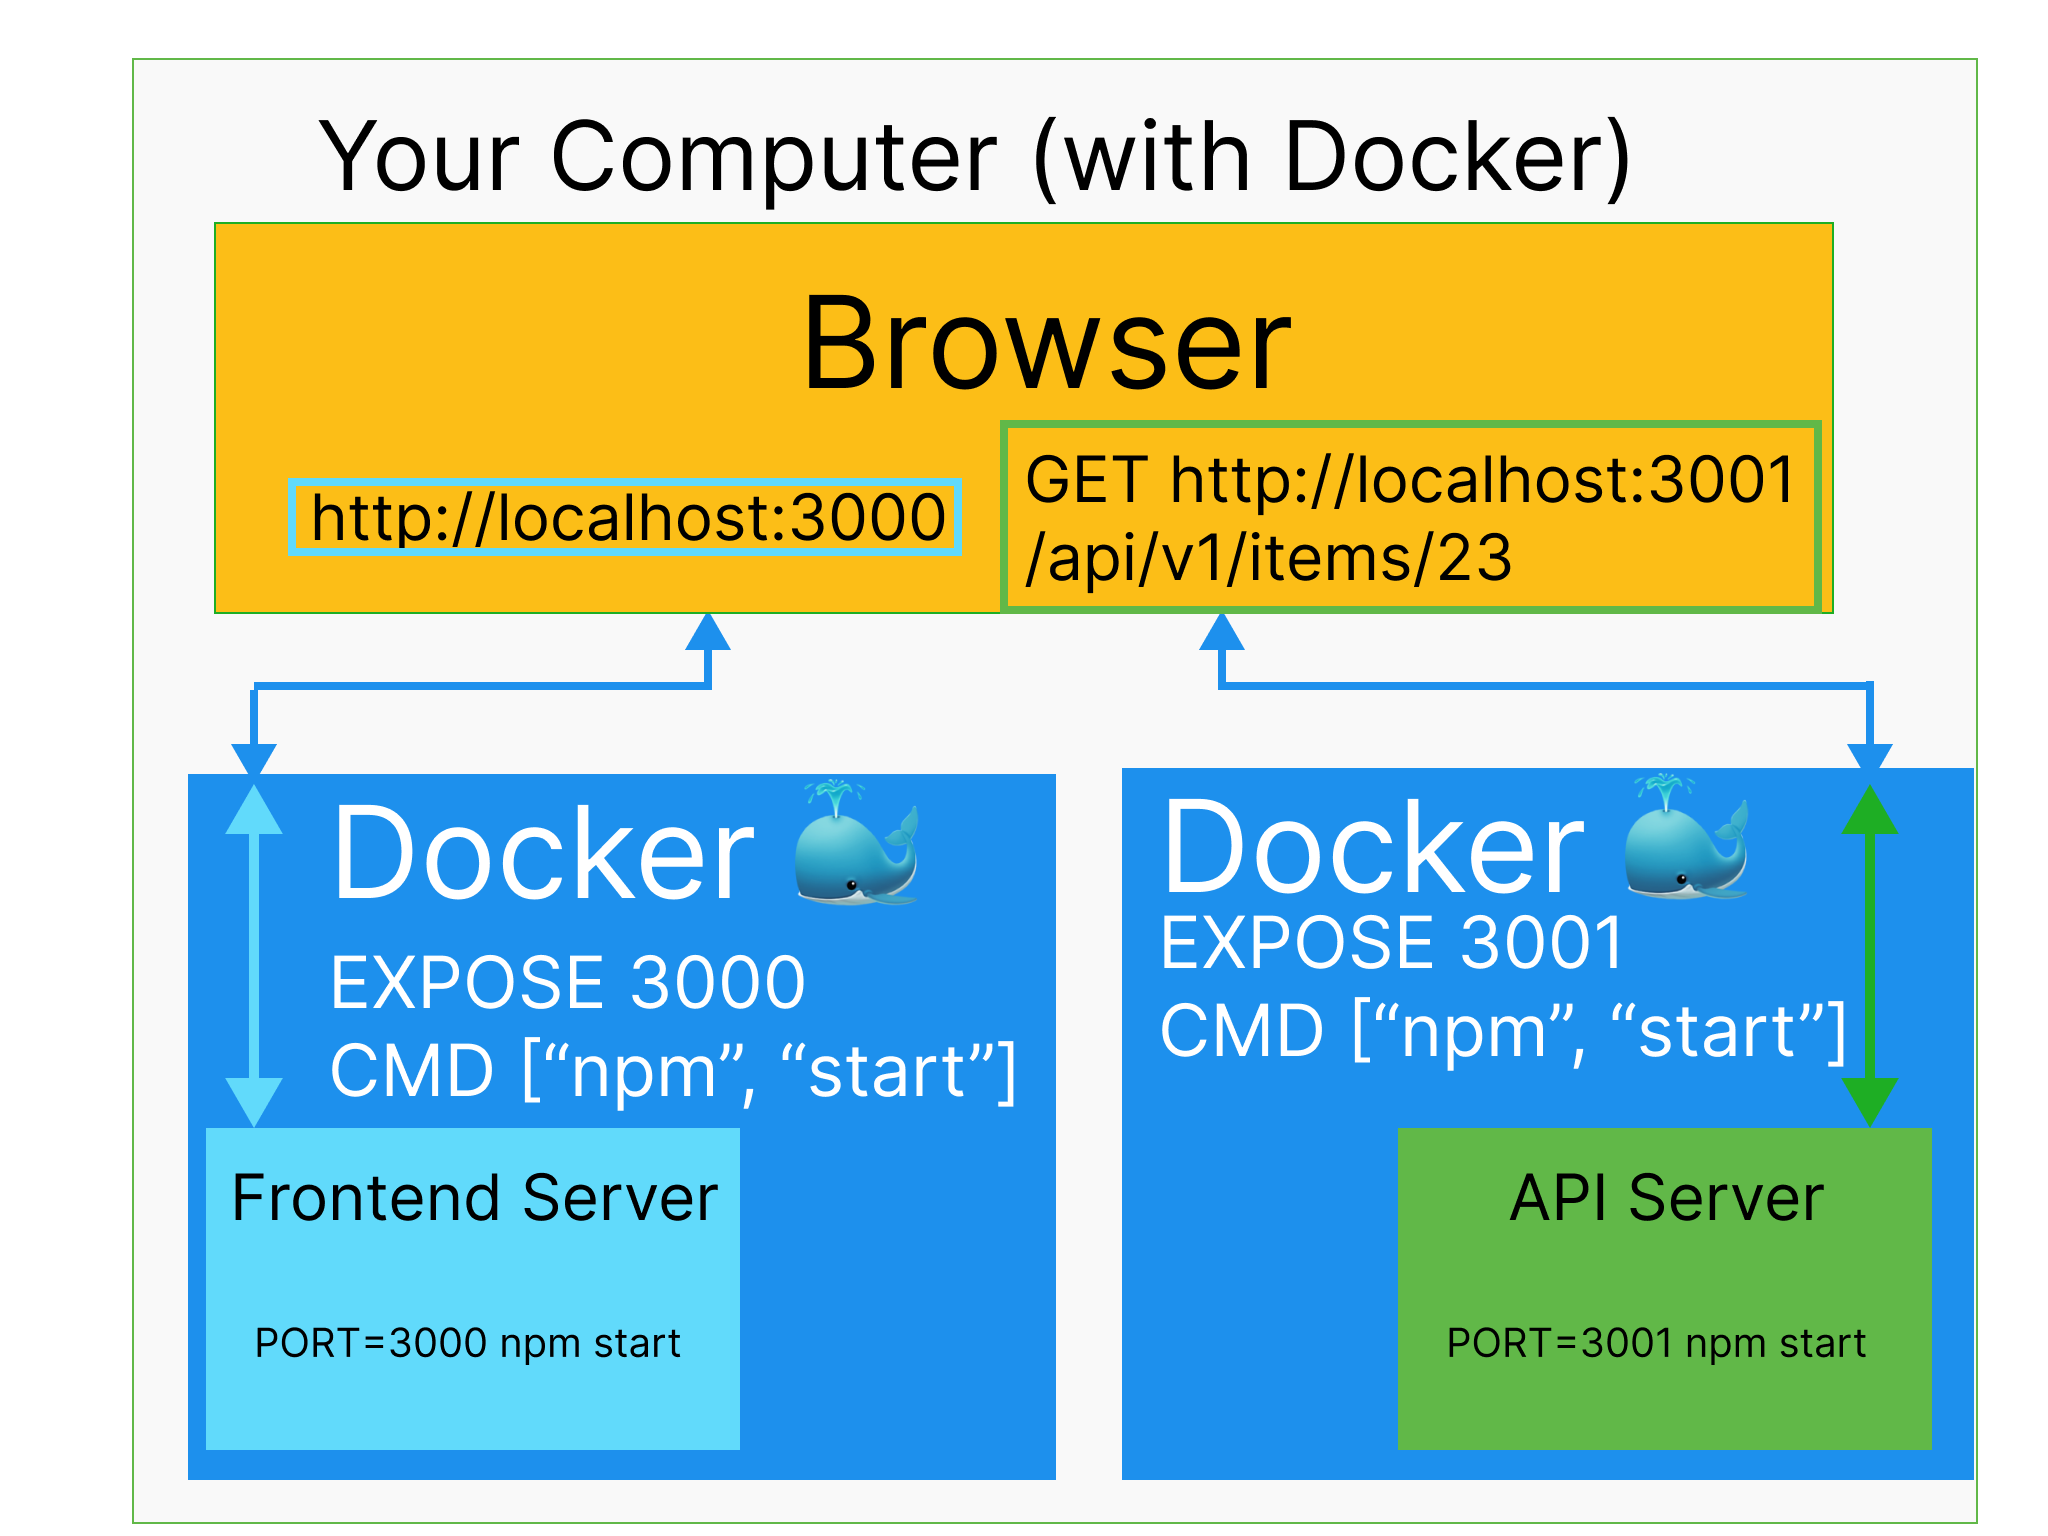
Our dev architecture after Docker.
To start the Frontend Server, use the same instructions from my last post
Now, put this Dockerfile in the root of the backend.
# Dockerfile for API server

# Start with a linux distro with node installed
FROM node:18

# Use /app as our working directory in the container
WORKDIR /app

# Set an environment variable for our sever
ENV PORT=3001

# Copy the files the server needs
COPY ./package.json ./package.json
COPY ./stamps.json ./stamps.json
COPY ./index.js ./index.js

# Install deps
RUN npm install

# Open Docker's "firewall"
EXPOSE 3001

# Start the API Server
CMD ["node", "index.js"]
Now we have a Dockerfile for the frontend Create React App, and a Dockerfile for the API Server.
To build the API Server’s image, we cd into the root directory of the API Server project and use…
$ docker build . --tag my-api-server:v1 --file Dockerfile
Then we can run it with…
$ docker run --publish 3001:3001 my-api-server:v1
Using the Dockerfile from the last post for the frontend, we can cd into the front end directory and run…
$ docker build --tag my-frontend:v1 --file Dockerfile
$ docker run --publish 3000:3000 my-frontend:v1
And we have two servers running, one for the API Server, and one for the Frontend.
You can go your browser and visit http:localhost:3000 to access them.
Docker Compose YAML
The next step is to use docker compose to start both up together. To do this we can use a different tool called Docker Compose.
Let’s use this directory structure for our project.
./my-app
    docker-compose.yml
    ./frontend
        Dockerfile
        package.json
    ./src
    ./backend
        Dockerfile
        package.json
        index.js
Then our docker-compose.yml file can start up both of these for use and publish both the ports.
# docker-compose.yml
services:
  frontend:
    build:
      # build the frontend in the ./frontend dir
      context: ./frontend
      dockerfile: Dockerfile
    ports:
      # open the ports for the frontend
      - "3000:3000"
  api-serer:
    build:
      # build the api-server in the ./api-server dir
      context: ./api-server
      dockerfile: Dockerfile
    ports:
      # open the port for the api-server
      - "3001:3001"
    environment:
      - PORT=3001
docker-compose.yml has some similarities to the Dockerfile. You can specify which ports are allowed to tunnel in, and override ENV variables. But, it is a different tool. You can see it is more declarative and less procedural. It doesn’t have a RUN or COPY command. It has a different role the Docker. Instead of setting up a server, it starts services which you have set up, and then tells how they will be connected to each other and the world outside of Docker.
You can start both the client and server with…
docker compose up --build
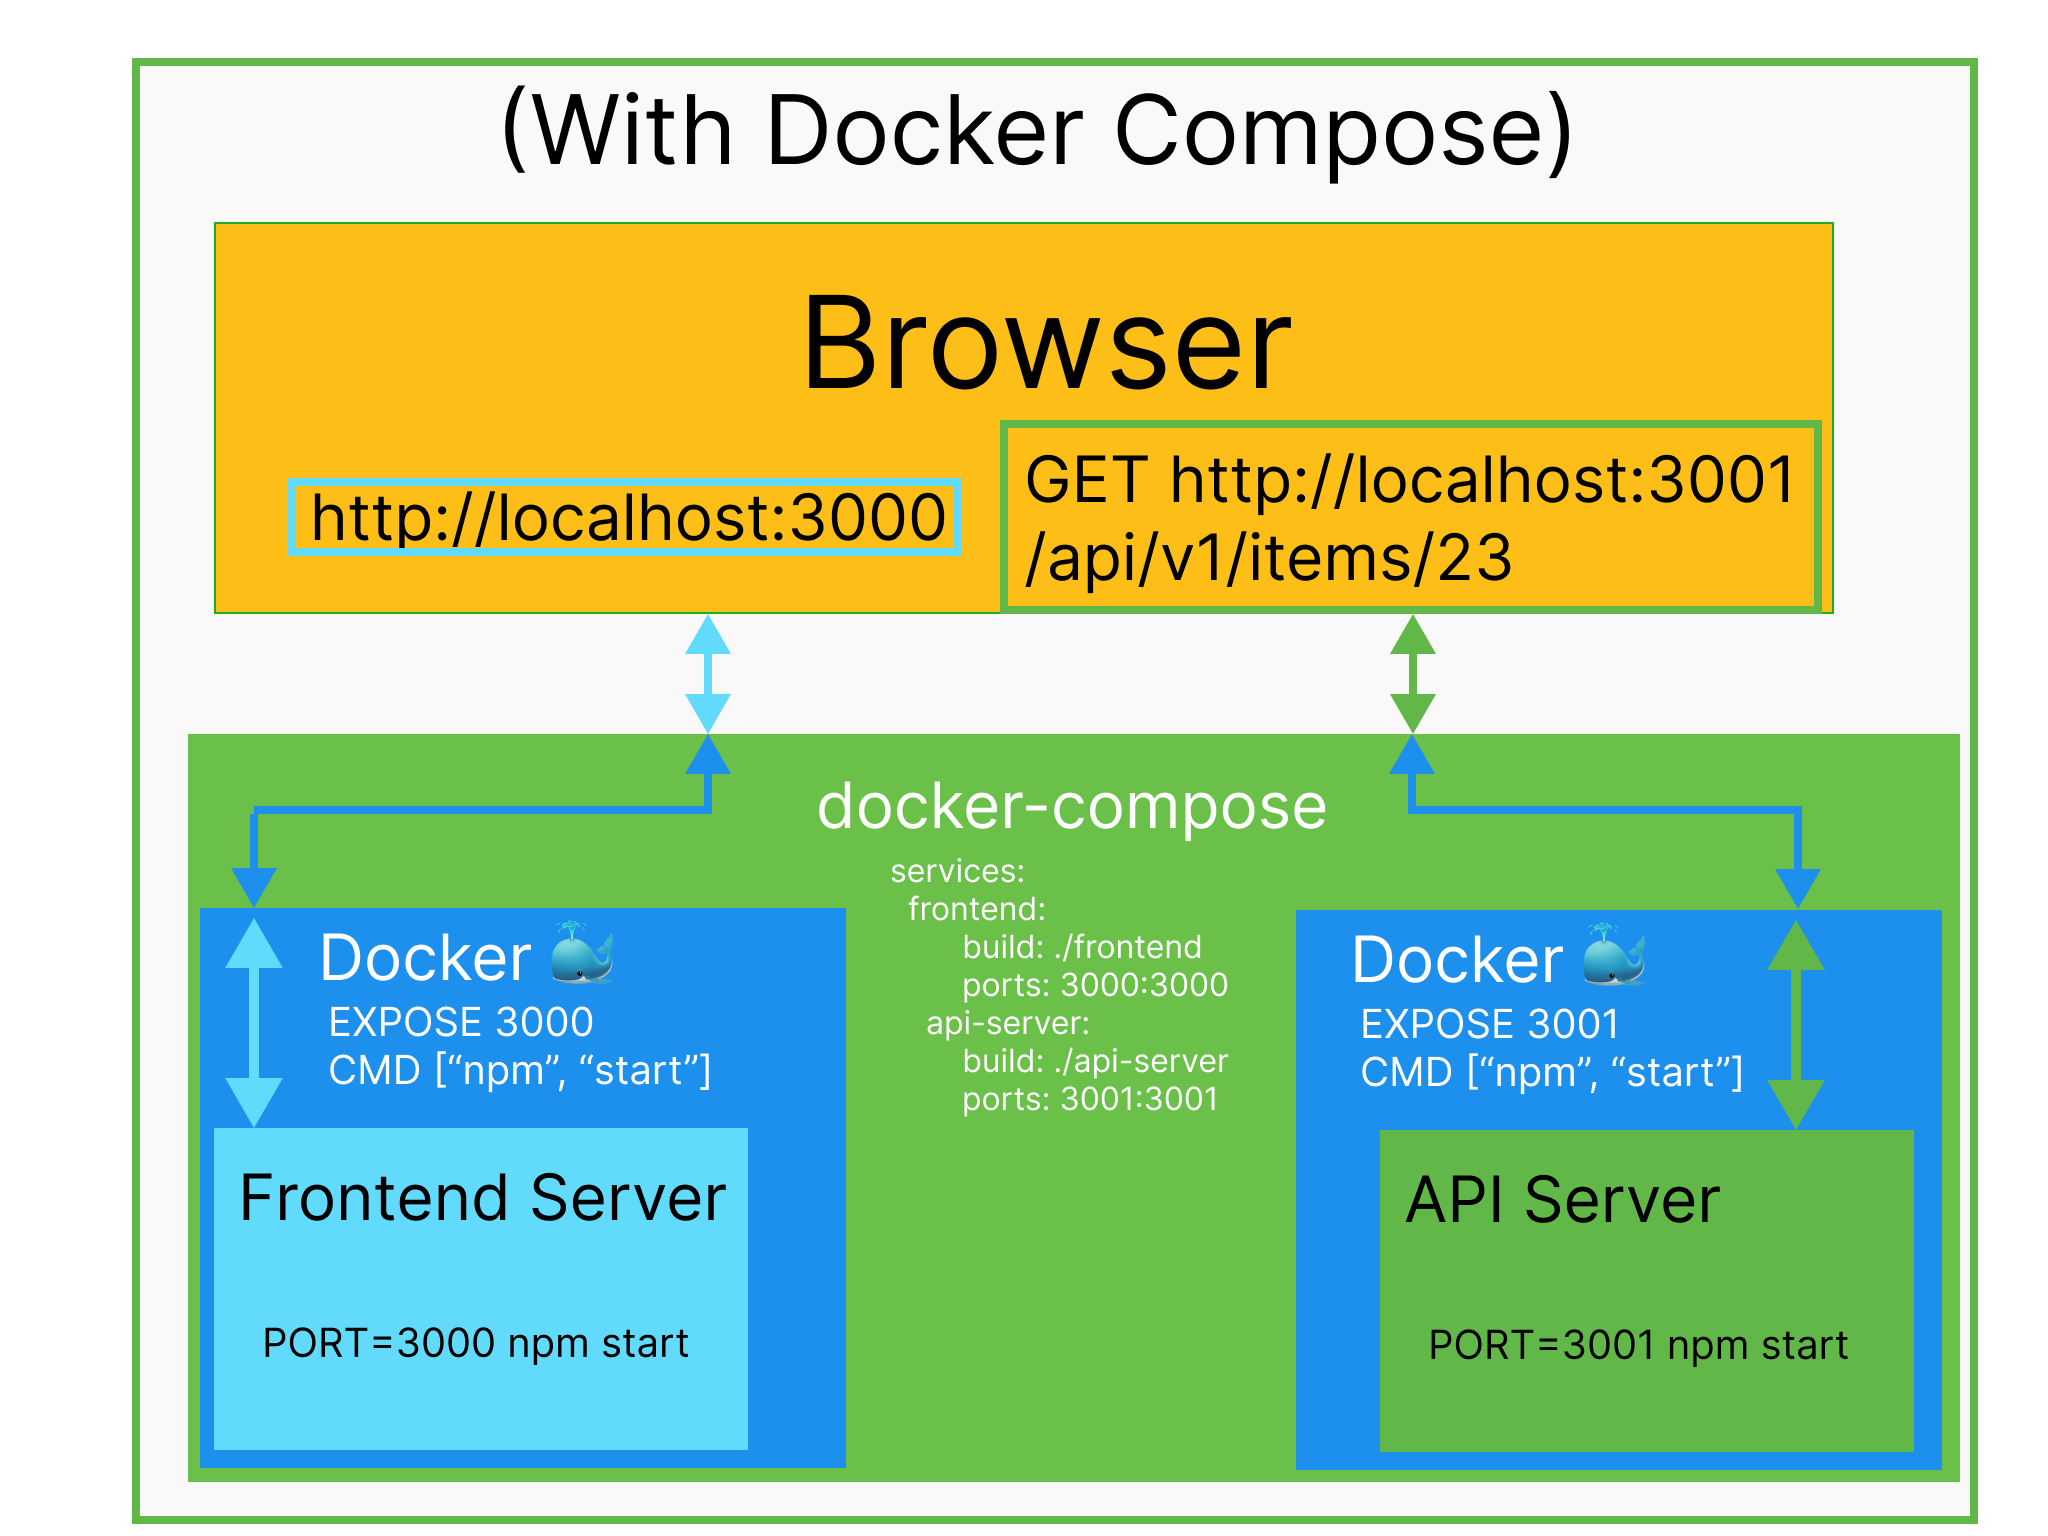
The diagram will now look like this.
Next, lets see what other ports or services we might find useful.